It's been too long of a wait for another tech tutorial! We’ve already learned about dotted lines, glyphs, zig zag lines, black & white effects, and thank you masks. Today, we're taking our first stab at InDesign. I personally prefer ID, but if you don't, have no worries. This will be easy!
Have you ever seen invitations that include a photo? Of course you have! Mama Giraffe and Daddy G once received one that included a wallet size photo of the couple and I mentally filed the idea away. I love it. Mr. G and I will be doing this for sure - many of my family members haven't met him yet so I would love for them to get to know "us" a little bit better for the big day.
Here's the thing, Hive, which I find totally strange. Wallet sized photos cost more than your average 4"x6" photo. I'll break it down for you. (Although, keep in mind, wallets come 4 per sheet).
- Winkflash: 4x6 = ¢.08, Wallets = ¢.39 (I order from here all the time, they're great!)
- Snapfish: 4x6 = ¢.09, Wallets = ¢.99
- Walgreens: 4x6 = ¢.1o, Wallets = ¢.99
- Shutterfly: 4x6 = ¢.15, Wallets = $1.79
Before we begin: All screenshots come from InDesign CS5 on a Mac. Once again, things are comparable to a PC.
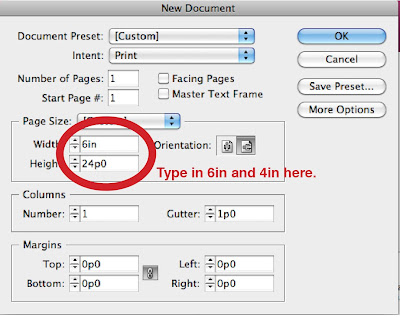
Step 1) Make a new document. Type in 6in for the width and 4in for the height. Set your margins to 0. Then click "OK."
 Step 2. Once you have your new document open, make a new rectangle
Press the key "M" for the rectangle tool. Then click once and the rectangle dialog box will come up.
 Type in "3in" for the width and "2in" for the height. Click "OK".
Then a new rectangle will appear on your screen. Yay!
Step 4.
Use your cursor to move your rectangle to the top left corner of your document. Just click down and drag.
 Step 5. Click on your rectangle to select it. The go to File > Place.
 A dialog box will pop up. Find the photo you're looking for. Choose it, and click open.
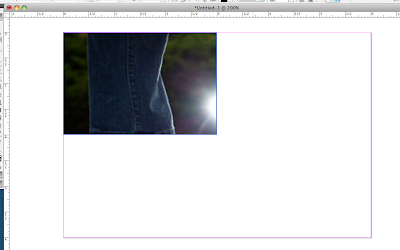
 Step 6. InDesign will place the photo into the rectangle you made. My photo is larger than the box I made, so only part of it shows up.
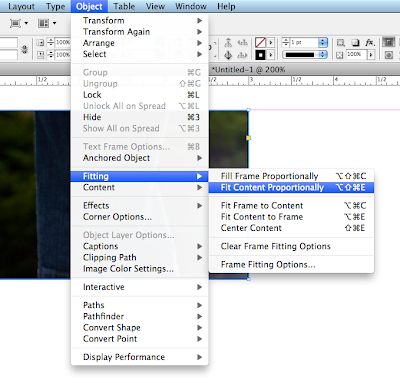
 To fix this, go to Object > Fitting > Fit Content Proportionally. You can also use my favorite ID key command which is command+shift+option+E (I use this one all the time!).
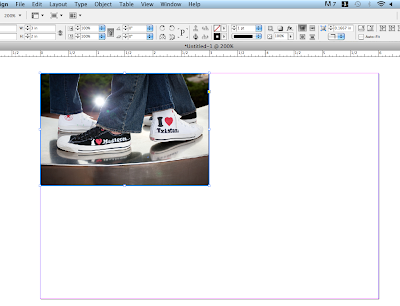
 Then you're photo will fit like so:
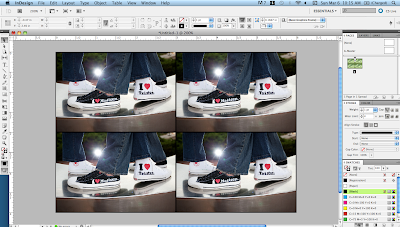
 Step 7. Simply Copy & Paste (you can go to edit>copy and edit>paste) so you have for photos. Simply click and drag each photo to each corner of the page.
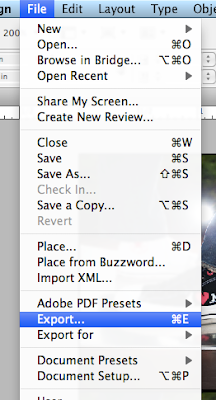
 Step 8. Now, all we have left is to make a JPG. Chose File>Export (key command: command +E).
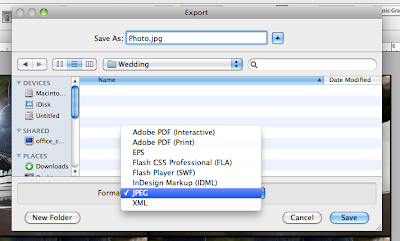
 When the dialog box pops up, name your photo and choose JPG at the bottom.
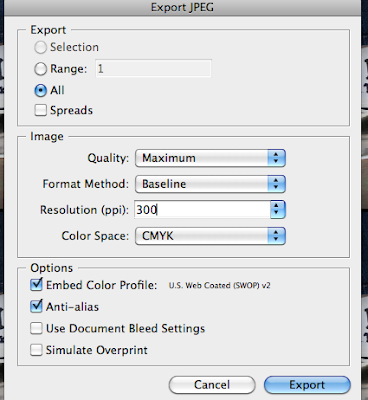
 Another dialog box pops up, and this one is important. Choose "Maximum" for quality, set your resolution as 300, and your color space as CMYK.
 Click "Export" !
And that's it! It is that easy! Now all you have to do is upload it to your photo program and order your wallets. Depending how many you order, you could save whole dollars! Hey, every little bit helps!
Anybody tucking wallet photos into their invites?
0 comments:
Post a Comment